L2TP Client: OpenWRT with Policy Based Routing
This guide was kindly written by Alan T on 04/04/2024
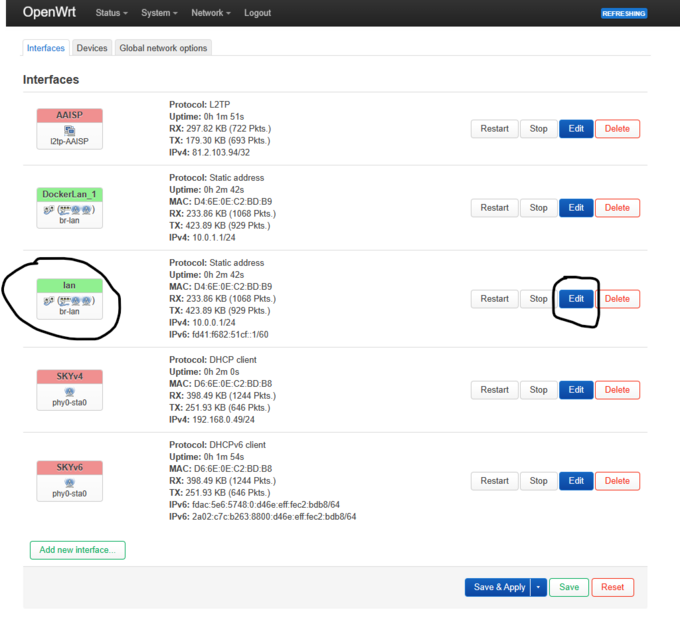
- 1. Configure LAN interface
- Click Add new interface, select Static address then enter
- Device br-lan
- IPv4 address 10.0.0.1 or 192.xxx.x.x
- IPv4 netmask 255.255.255.0
- Firewall Settings lan
- DHCP Sever On
- Click Save & Apply, then disconnect your WLAN connection and rejoin, or refresh IP address.
- 2. Set up WAN Connection
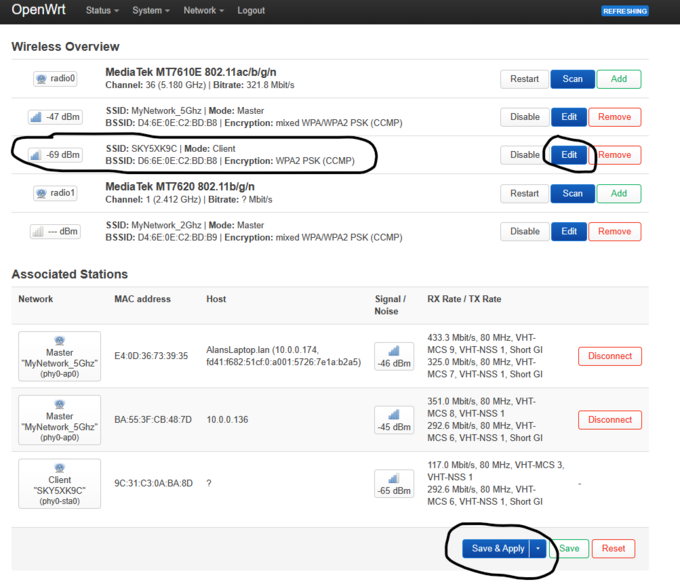
- This is depended on your WAN connection; however you will most likely need to connect to it wirelessly in Client mode :like myself, or create a DHCP client on eth0.2 (VLAN 2) interface which should default to untagging VLAN 2 on the WAN :interface.
- In most situations you should probably enable Masquerading on the WAN interface (default) which is found under Firewall.
- 3. Create LAN Access Point(s) & add security
- As above, in my case I have set up MyNetwork_5Ghz & MyNetwork_2Ghz, and have secured with a Passphrase. BOTH :interfaces are bound to the default br-lan interface which defaults to VLAN 1 (eth0.1) which untags ALL LAN ports.
- You can change this as you wish.
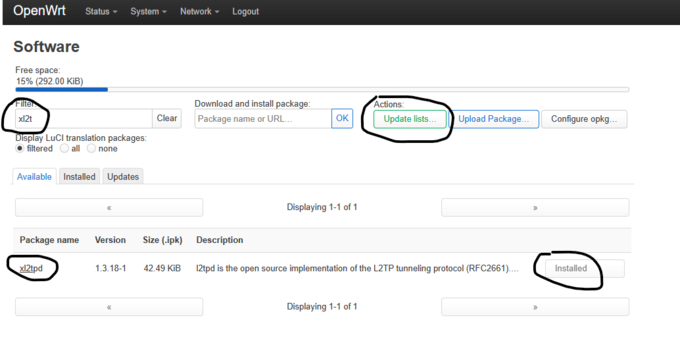
- 4. Download and Install xl2tpd
- Go into Software, click Update lists, and then search for xl2tpd, and then click to install.
- In my case I have already installed it, however a reboot will be required one you have installed it.
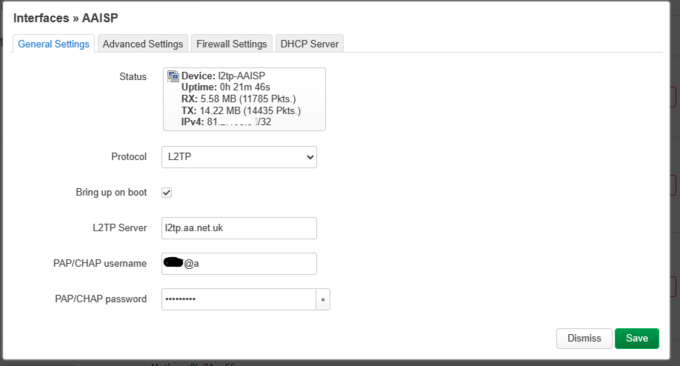
- 5. Configure AAISP L2TP Connection.
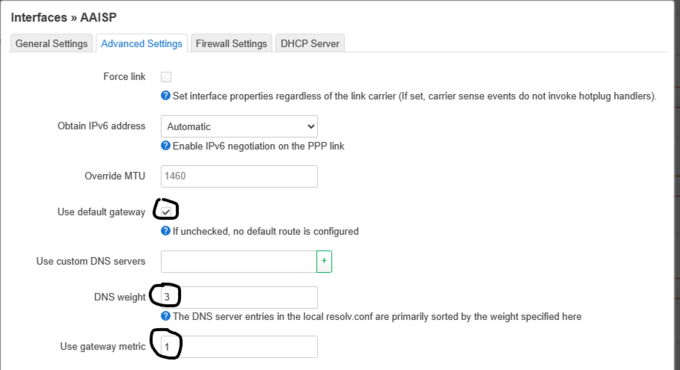
- Interfaces, Add new interface, select L2TP, and enter your login details, and information as shown below.
- The metric and DNS weight aren’t particularly important here for simple policy routing; however, these will be :required later on.
- I have set my WAN interface up with metric 2, and DNS weight 3.
- Use default gateway also selected.
- 6. MWAN3 Package – Policy Based Routing Installation.
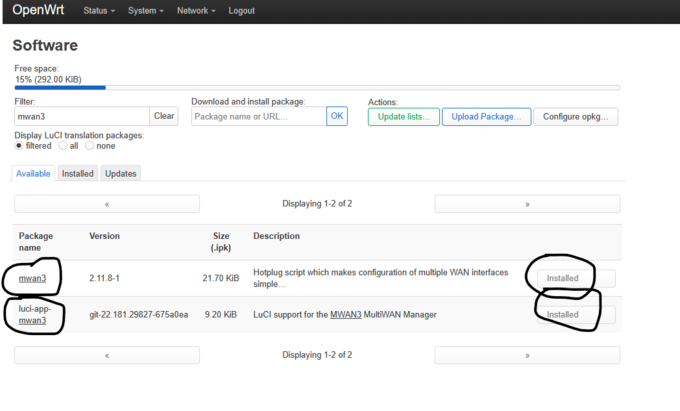
- Same as installing xl2tpd really, except that you will want to install mwan3, and the luci snap in for it.
- 7. MWAN3 configuration.
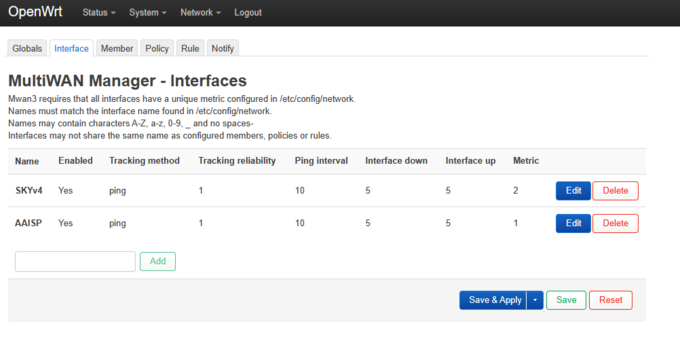
- Network -> MultiWAN Manager
- The Name MUST match exactly to the interface names for your L2TP connection, and you’re your other WAN connections. If :set correctly, then the Metric should be pulled from the interface.
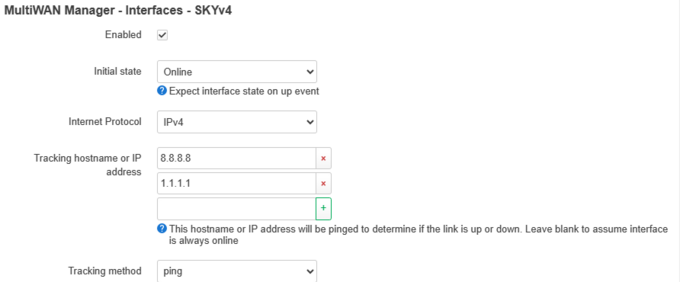
- Set Ping, and enter something to ping. A couple of public DNS servers should work nicely. Everything else defaults.
- Ignore everything else, except that you will want to edit the wan_m1_w3, and wan_m2, w3, and select your interfaces as :specified in MWAN3 interfaces.
- Under policy, create two new policies, and add AAISP_ONLY, or VPN_ONLY, or TUN_ONLY, and then pop wan_m1_w3 into it, :and do the same for your WAN connection selecting wan1_m2_w3. In my case I have sky broadband so I created a WAN :interface called SKY, and refer to my internet connection as SKY, or SKY_ONLY
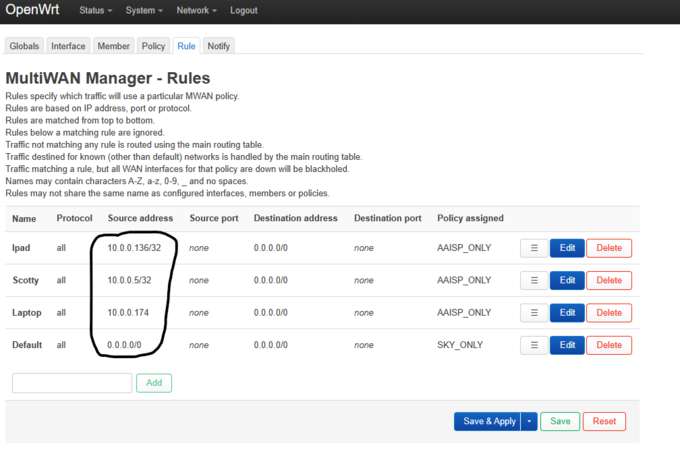
- Rules are pretty simple, and are run from top bottom sequentially. In my case I want to send everything on my network :directly over Sky unless it’s a server. I set up iPad & Laptop so that I could switch between AAISP/SKY to test :external IP with http://ip.help.me.uk.
- This configuration works a treat!
- 8a. Ports Forwards.
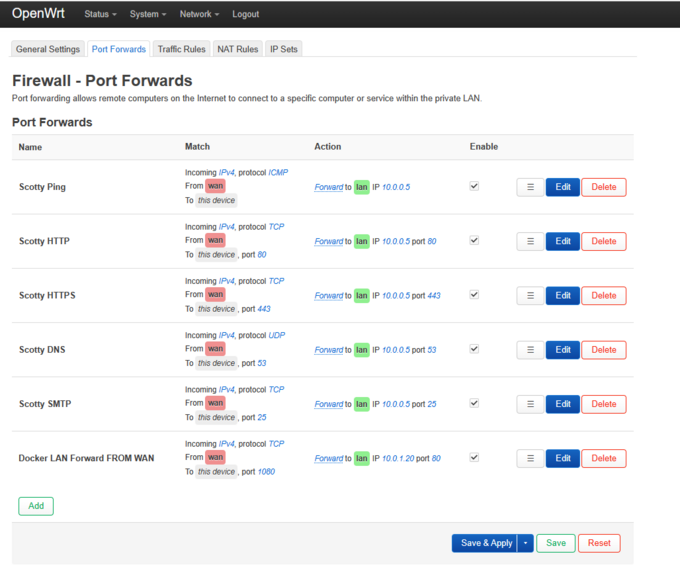
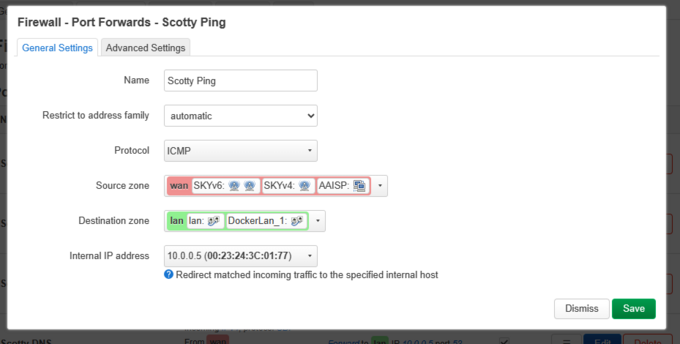
- Last thing to do is to configure Port forwards to your server, and your running services. In my case I am running a LAMP :server on my network, and the same server hosts the DNS for my domain, and I am also running a Postfix/ Dovecot :server for :Mail.
- I also run a small Docker cluster (IPVLAN 10.0.1.0/24) for playing with, and in this case I am forwarding TCP 1080 to :one of my containers running Apache on TCP 80.
- 8b. Firewall Configuration for Port Forwards
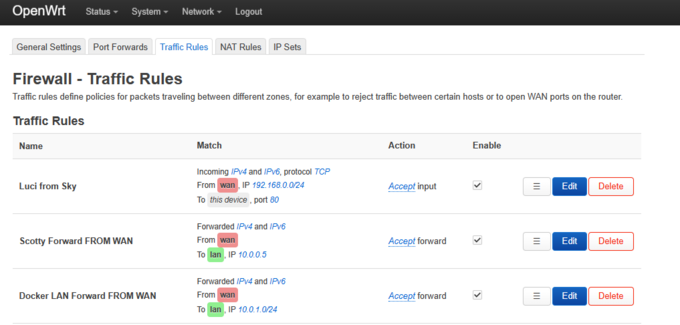
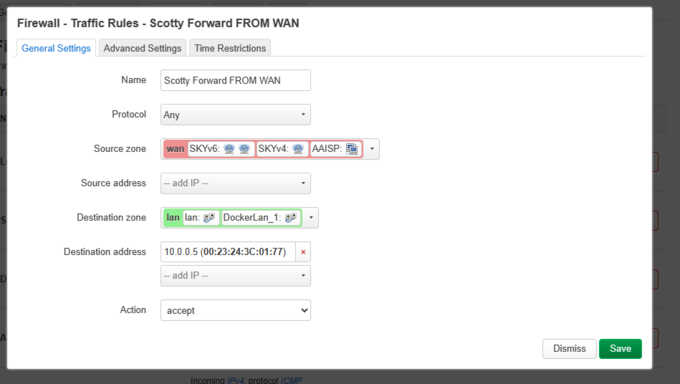
- I have been a little lazy with my firewalling, however providing there isn’t a port forward in place, then the ports :won’t be exposed.
- The Luci from Sky rule allows me to administer the OpenWrt config from the shared sky service, which is a good :fallback if you accidentally screw your LAN config.
- I think that’s about it. I haven’t created any special routes for the L2TP service, since OpenWRT automatically sets :them up, which is really nice.
Save your config!
