Setting up the XClaim Xi-2/3
The quickest way to set up the XClaim is to use the XClaim harmony app - you can find this on the Google Play or iTunes App Store.
Download Links: Google Play | App Store
The screenshots below are from Android. The iPhone interface may be different!
Setting up the Harmony App
1. Once plugged in, the XClaim will present an SSID of 'xclaim-setup'. Connect to this access point first!
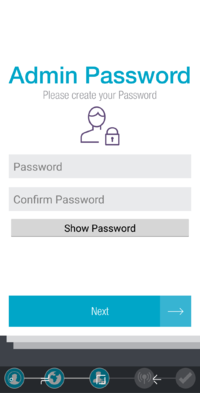
2. Open up the Harmony app and run through the initial steps. You will get to a point where you have to set an admin password. This password will be used for the access point, so do remember it.
3. Set your SSID , or skip this step.
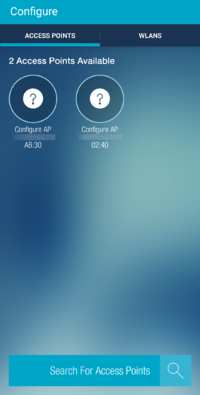
4. Hit 'Finish'. On the following screen, hit 'search for Access Points'. This step can be slow. Once done, you should see your new access point in the list. Click it.
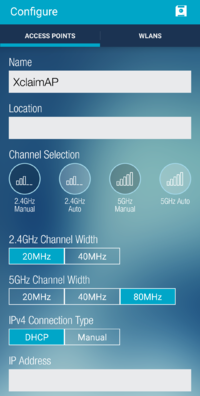
5. From here you can set your SSID and Channel Width settings. Once you are happy with these settings, hit the save button at the top right. The access point will then apply these settings and restart which will take a few minutes.
Logging into the Xi-2/3 Web Interface
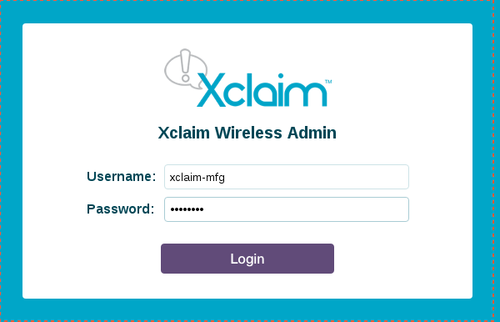
1. Now that the access point has been configured through the app, you can now log into it through the web interface. You can access it on HTTPS on the LAN.
2. Log in using the username xclaim-mfg and the admin password that you had set in the app.
3. Once logged in you can modify the settings for the XClaim access point to your liking.


