
Changing Windows MTU
The MTU (Maximum Transmission Unit) is the size of the largest network packet that can be transferred in a single network transmission without any fragmentation happening.
We have a separate page on testing your MTU.
Sometimes you may have a reason to change the MTU on your windows computer. Here is how.
We will show you how to show the existing MTU, and then how to change it, and then how to revert it back to what it was originally. We're using Windows 10 in this example.
1. Open Command Prompt, as Administrator
- Click
start - Type
cmd - On the Right hand side, click
'Run as administrator'
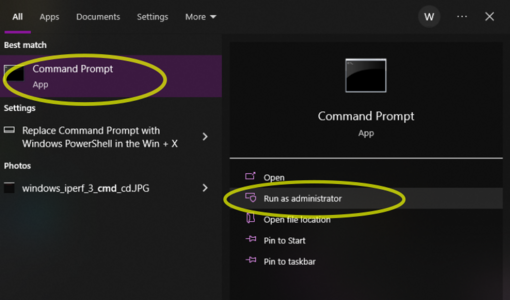
Open command prompt, as Administrator

2. Show the current MTU and the interface name
- Enter in the command:
netsh interface ipv4 show subinterfaces - Make a note of the existing MTU (probably
1500) - Make a note of the interface name - eg
Ethernet
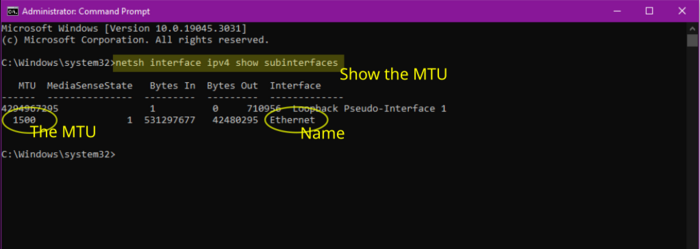
Show the current MTU and interface name

3. Change the MTU for the interface
- Enter the command:
netsh - Then:
interface - Then:
ipv4 - Then:
set subinterface "Ethernet" mtu=1320 - Then:
exit
The screenshot shows all these commands being run...
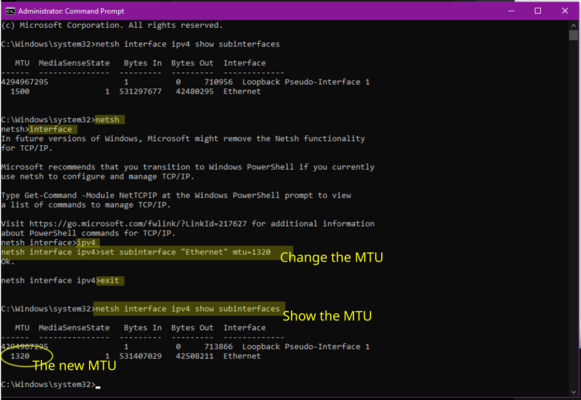
Changing the MTU to 1320

5. Check the MTU
- Run the first command to show the Interface details again:
netsh interface ipv4 show subinterfaces - It should now show
1320
6. Reverting back
- Restarting the computer should change the MTU back to default
- Or, you can run the commands above, but set
1500instead of1320
7. Keeping the MTU change permanent
If you want to keep thje lower MTU even after a reboot, then re-run the commands, but when you come to change the MTU add store=persistent to the command.
eg set subinterface "Ethernet" mtu=1320 store=persistent