
FireBrick IPsec (Road Warrior Howto): Difference between revisions
| Line 130: | Line 130: | ||
===Install the CA certificate=== |
===Install the CA certificate=== |
||
To install the certificate: |
To install the certificate: |
||
# Double-click on <tt>Certificates (Local Computer)</tt> in the left pane, to open the certificate store names, and then right-click on <tt>Trusted Root Certification Authorities</tt> in the centre pane. |
|||
# Select <tt>All Tasks</tt> and then <tt>Import...</tt> |
|||
# Click <tt>Next</tt> and browse to where you saved the CA .crt file. |
|||
# Click <tt>Next</tt> and check that the certificate will be placed in the trusted root store. |
|||
# Click <tt>Next</tt> again, and then <tt>Finish</tt>. |
|||
There - wasn't that easy! Thank you Microsoft. |
There - wasn't that easy! Thank you Microsoft. |
||
| Line 140: | Line 140: | ||
Now you need to set up the IPsec network connection details. |
Now you need to set up the IPsec network connection details. |
||
# Go to Control Panel and select <tt>Set up a new connection or network</tt>. |
|||
# Select <tt>Connect to a Network</tt> and choose <tt>Connect to a Workplace</tt>. |
|||
# Click <tt>Next</tt>, select <tt>No, create a new connecton</tt>, <tt>Next</tt> |
|||
# Choose <tt>Use my Internet connection</tt> |
|||
# Insert the server name (eg <tt>server.example.com</tt>), and choose whatever you like to name the connection (Destination name). |
|||
# Select <tt>Don't connect now; ...</tt> |
|||
# You don't need to enter User name and password as it will ask again later |
|||
# Click on <tt>Create</tt> and then <tt>Close</tt> (Don't connect yet!) |
|||
# Back at the Network and Sharing Center dialog, select <tt>Connect to a network</tt> |
|||
# Right-click the connection you have just created in the pop-up box and select <tt>Properties</tt> |
|||
# Select the <tt>Security</tt> tab, and change the Type of VPN to IKEv2. |
|||
# EAP-MSCHAPv2 should already be selected. |
|||
#Click <tt>OK</tt> |
|||
You should now be ready to connect - select <tt>Connect to a network</tt> again, click |
You should now be ready to connect - select <tt>Connect to a network</tt> again, click |
||
Revision as of 09:44, 30 July 2015
FireBrick Road Warrior IPsec
The FireBrick manual goes into some detail on configuring IPsec. This page contains specific examples for a simple scenario where you have one or more clients devices - iPhones iPads, Android phones/tablets or Windows machines, and a FireBrick in your home or office, and you would like to VPN (using IPsec) to the FireBrick and have an IP address on your LAN.
In this example we are assuming you can allocate some IP addresses on you LAN. You do this by picking a range of addresses and setting up a roaming-pool (see below). You need to ensure the IP range does not clash with devices on the LAN and is not in the DHCP ranges that could allocate to the LAN. You also need to set proxy-arp on the LAN interface settings to allow communications to other devices on your LAN. Alternatively you could set private IP addresses in the pool and set the nat setting. You should probably also consider firewalling rules for traffic to/from IPsec connections.
Creating Certificates
There are three tools to help with setting up Road Warrior connections on the FireBrick web site. You can download these by viewing with a browser and saving the source, or using curl or wget. make-key creates a private key. make-cert makes a certificate (signed with a key). make-profile makes an iPhone profile file that allows the VPN to be configured on the iPhone. For security reasons, all of these need you to run them locally (e.g. on a linux box, or windows under Cygwin).
Certificate Authority
Let's start by making a Certificate Authority (CA). This signs certificates, such as the one we load in to the FireBrick end of the link. The CA ends up as being two files - one is the private key file, which you keep secret. This is what you need to sign things with the CA. The other is the actual certificate file, signed by the key.
First make the private key file for the CA. We'll call it ca-key.pem. This file should be kept secret.
./make-key ca-key.pem
Then make a certificate file, and sign it using the key file. We'll call it ca-cert.pem. This involves several attributes in the DN (Distinguished name) which mostly don't matter much for your own certificate (/C=Country, /ST=State, /L=Locality, /O=OrganisationName, /CN=CommonName). Typically you would set just the CommonName, using your home or company name (eg /CN=Acme Widget CA).
./make-cert CA DN="/C=GB/O=My Office/CN=example.com" KEY=ca-key.pem ca-cert.pem
FireBrick (server) certificate
Next we make a certificate file for the FireBrick itself. This is how the FireBrick proves itself to the client device. Again, there is a key and a cert file for this, with both being loaded in to the FireBrick. The key is what allows the FireBrick to prove itself. The cert is signed by the CA key, which is how the phone knows to trust the FireBrick. Note the extra FQDN= which sets the SubjectAltName. The FQDN entry is just a name used to get the right certificate, and should match the local-id (prefixed FQDN:) in the config so that the FireBrick can work our which certificate to use when negotiating, and the client can check the certificate matches the server.
First make a private key, e.g. server-key.pem
./make-key server-key.pem
Then make a certificate, e.g. server-cert.pem
./make-cert DN="/C=GB/O=Server/CN=server.example.com" FQDN=server.example.com KEY=server-key.pem ISSUER-KEY=ca-key.pem ISSUER=ca-cert.pem server-cert.pem
FireBrick Certificate Config
The FireBrick needs copies of the CA certificate and the server certificate and private key.
Load these files - ca-cert.pem, server-key.pem, and server-cert.pem - using the FireBrick X.509 certificate and key management UI page (Config Certificates).
The private key associated with the CA certificate ca-key.pem is no longer needed once it has been used to sign the server certificate. It is a good idea to store this file in a safe place (eg on a memory stick in a secure location), and remove it from any networked machine. It can of course be retrieved and reused if you wish to make further server certificates using the same CA certificate.
Summary of Certificates
Once you've run the commands above to create the certificates, you'll end up with five files as follows:
| File | Description | Use |
|---|---|---|
| ca-cert.pem | Company CA Certificate file | Upload to FireBrick |
| ca-cert.srl | ||
| ca-key.pem | Private CA key, this signs certificates | Store in a safe place |
| server-cert.pem | FireBrick Certificate | Upload to FireBrick |
| server-key.pem | FireBrick Private Key | Upload to FireBrick |
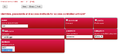
On the FireBrick, you should have a set of certificates such as:

FireBrick IPsec config
The FireBrick needs a configuration for the connection, and roaming pools and user identities. The connection can be used for any number of devices at once with the same pool of IP addresses; each would have a user name and password defined.
The basic server config is in ipsec-ike containing a connection and roaming entry, e.g.
<ipsec-ike>
 <connection name="server" roaming-pool="roam-pool" auth-method="Certificate" peer-auth-method="EAP" mode="Wait" local-ID="FQDN:server.example.com"/>
 <roaming name="roam-pool" ip="[ranges of LAN IPs]" DNS="[DNS, e.g. 8.8.8.8]"/>
</ipsec-ike>
Each roaming user then needs an eap user record.
<eap name="fred" full-name="Fred Bloggs" password="[password]" subsystem="IPsec" methods="MSChapV2"/>
Here is how the above three config sections look in the User Interface (UI):
-
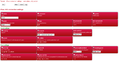 IKE Settings (UI)
 -
 Roaming Pool Settings (UI)
 -
 EAP User (UI)


iPhone profile
Each iPhone needs a profile file specific to that user. Once created you can email this, or make a web link to it, and the iPhone will recognise it and allow it to be installed. Let's call it fred.mobileconfig for our user called fred as in the above example config.
./make-profile SERVER=IP-of-server LOCALID="Fred's iPhone" CA=ca-cert.pem SERVERID=server.example.com USERNAME=fred PROFNAME="Office VPN" VPNNAME=FireBrick fred.mobileconfig
Note that the SERVERID must match the FQDN entry used when making the server certificate, and hence the local-ID in the config for the connection.

Android setup
We recommend you use the StrongSwan app on Android. The app then needs the CA certificate which you can email yourself and install, and the settings for the host name, user name, password.
Windows setup
The following instructions were tested on a Windows 7 system. Setup on other versions of Windows will be similar, but the dialogs and messages seen may not be exactly as shown here.
The CA certificate needs to be installed on the Windows machine using an account with administrator privileges.
First, download the CA certificate in DER format to the Windows machine. The easiest way to do this is to use a browser to visit your FireBrick certificate management page, and click on the Download DER link corresponding to the CA certificate. Save it in a suitable location on the Windows machine. Do not attempt to execute it or install it just yet. Note that you must download the certificate in DER format - windows machines do not recognize PEM format. The file will be given the .crt extension.
Start the Windows Certificate Manager
The Windows certificate manager should now be started up as follows:
- Using a command window, or the Start|Run box, execute the command mmc (and answer Yes when asked if you want to allow changes).
- Select Add/Remove Snap-in from the File menu, choose the Certificates snap-in and add it to selected snap-ins.
- A dialog will ask if you want to manage certificates for the user account, a service account or computer account. You must select Computer Account here in order to manage the system certificates. If you do not select this, or you start up the certificate manager in some other way (eg using certmgr.msc, you will not be able to install the certificate system-wide, and the Windows IPsec subsystem will not find it.
- Another dialog will ask which computer to manage. Choose Local computer.
- Finally click on OK to start the certificate manger snap-in.
Install the CA certificate
To install the certificate:
- Double-click on Certificates (Local Computer) in the left pane, to open the certificate store names, and then right-click on Trusted Root Certification Authorities in the centre pane.
- Select All Tasks and then Import...
- Click Next and browse to where you saved the CA .crt file.
- Click Next and check that the certificate will be placed in the trusted root store.
- Click Next again, and then Finish.
There - wasn't that easy! Thank you Microsoft.
Now you need to set up the IPsec network connection details.
- Go to Control Panel and select Set up a new connection or network.
- Select Connect to a Network and choose Connect to a Workplace.
- Click Next, select No, create a new connecton, Next
- Choose Use my Internet connection
- Insert the server name (eg server.example.com), and choose whatever you like to name the connection (Destination name).
- Select Don't connect now; ...
- You don't need to enter User name and password as it will ask again later
- Click on Create and then Close (Don't connect yet!)
- Back at the Network and Sharing Center dialog, select Connect to a network
- Right-click the connection you have just created in the pop-up box and select Properties
- Select the Security tab, and change the Type of VPN to IKEv2.
- EAP-MSCHAPv2 should already be selected.
- Click OK
You should now be ready to connect - select Connect to a network again, click on the connection and choose Connect
You probably want to change the type of network to Work Network after the connection establishes.