Router - TG582N - Port Forwarding UI
Here are 2 examples of using the web interface to create a portmap.
Port map Example of SMTP using the the Technicolor web interface.
Here, we have an SMTP email server on our internal network on IP
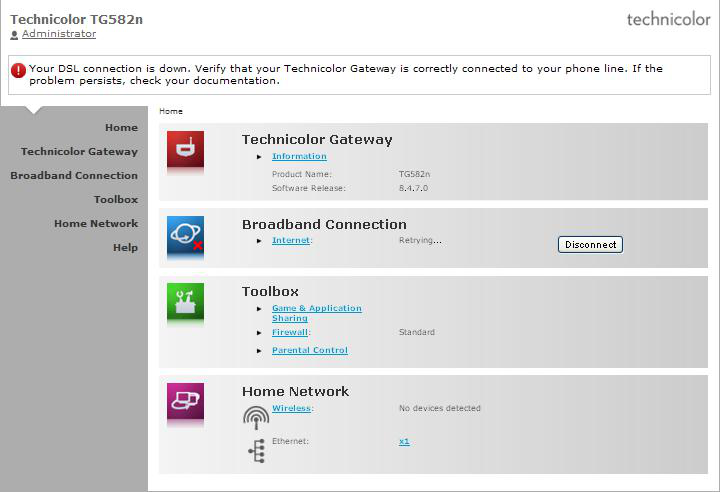
1. Open an Internet browser and browse to: http://192.168.1.254/ (or whatever IP the router is on 192.168.1.64)
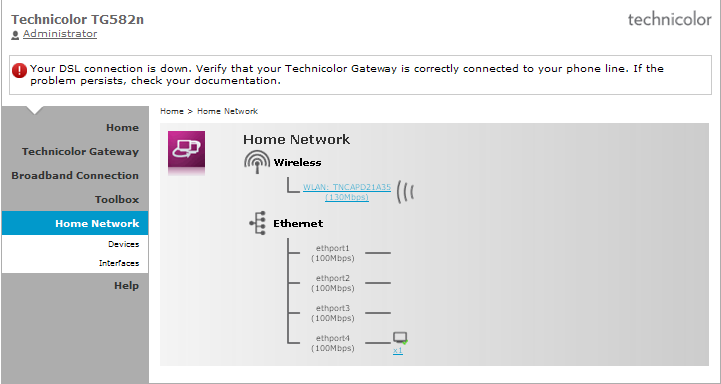
2. Click Home Network on the left menu.
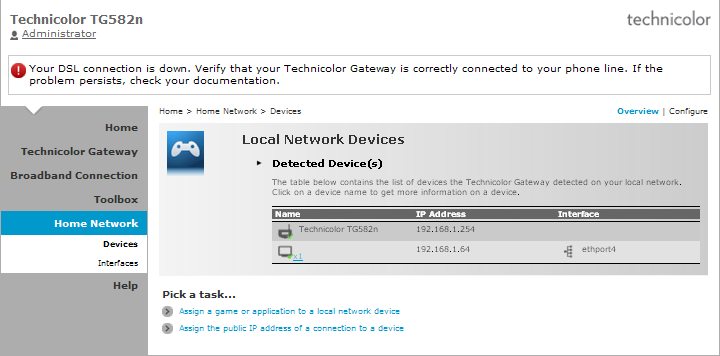
3. Click Devices on the menu which appears under Home Network.
4. Click on the link related to the device you would like to forward traffic to (in this example our smtp server is called x1).
5. Click Assign a game or application to a local network device under the heading Pick a tast...
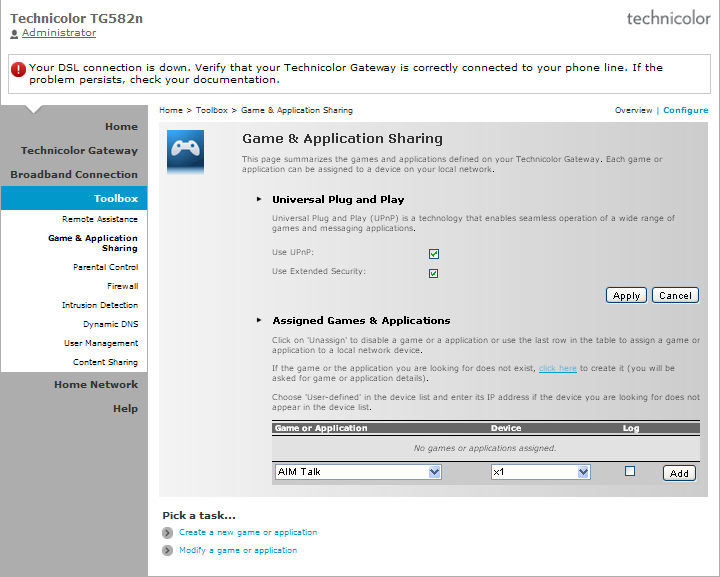
6. The router includes a number of pre-configured port forwarding settings for well known applications.
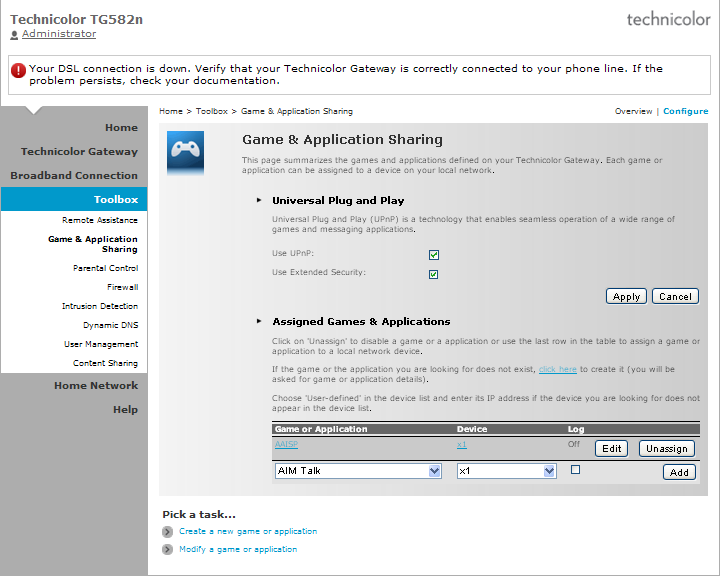
Select the name of the application you need to forward ports for from the drop-down box under the heading Game or Application.
If the application is not listed then skip to the section below on configuring port forwarding for an unlisted application.
7. Click Add
Your router is now set up with the port forwarding configuration.
Configure Port Forwarding for an unlisted application:
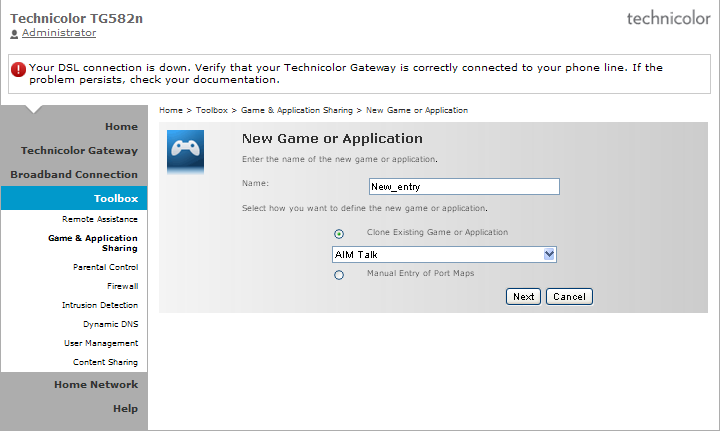
1. Click Create a new game or application under the heading Pick a task...
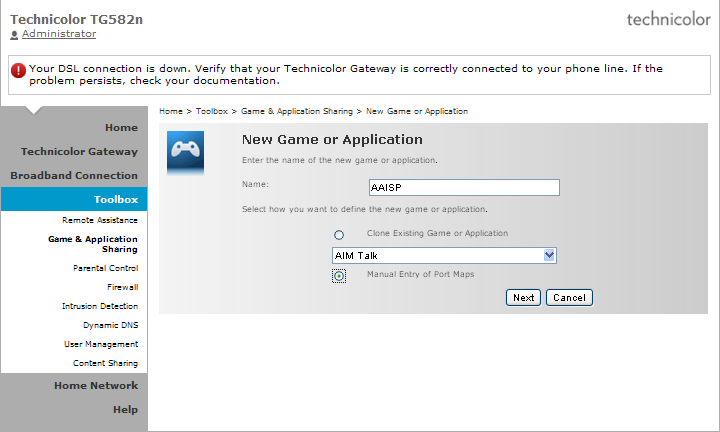
2. In the box labelled "Name:" type a name for your application.
3. Click Manual Entry of Port Maps
4. Click Next
5. Select the protocol from the drop-down menu under the heading Protocol. If you do not know which to use select Any.
6. Fill in the start and end port of the range in the two boxes beneath the heading Port Range. If only one port is needed enter this in both boxes.
7. Leave the other boxes empty and click Add.
8. Repeat this step for any other ports or ranges that need to be assigned for this application.
9. Click Apply.
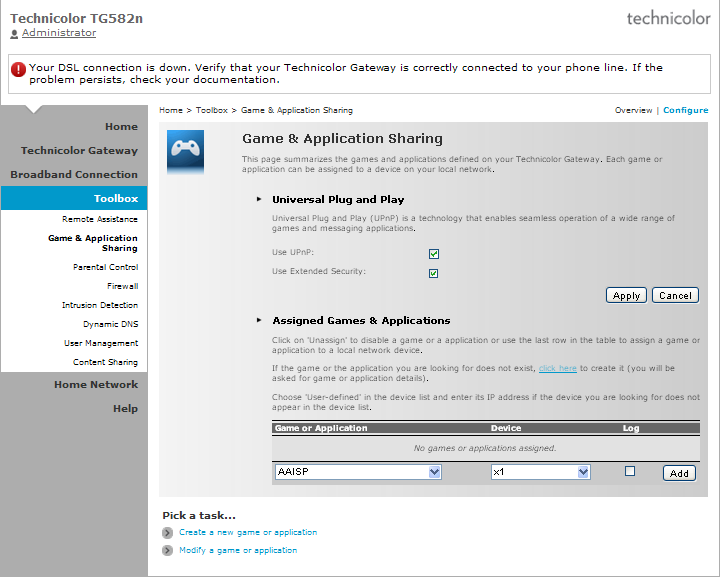
10. Click on the option to Assign a game or application to a local network device.
11. Locate your new application from the drop-down menu under the heading Game or Application.
12. In the drop-down menu under the heading Device select the name of the device you need to forward ports to.
13. Click Add.
Your router is now set up with the port forwarding configuration.
Other pages regarding this router:
<ncl style=bullet maxdepth=5 headings=bullet headstart=2 showcats=1 showarts=1 showfirst=1>Category:Router TG582N</ncl>

