POP3 Tips
TL;DR
Before February 2019 it was possible to delete the spam folder and therefore all messages (including spam messages) were delivered to the Inbox and downloaded by your POP3 client - it is not possible to delete the spam folder on on our new email servers (Which came in to service from February 2019). Therefore, by default, spam messages will be delivered to a 'spam' folder on the server which will not be downloaded when you collect email by POP3. The work-around here is to create a sieve rule as described below, to save all messages to your Inbox.
Introduction
We'd usually suggest to use IMAP to connect to our mail servers, but POP3 is supported too.
There are a couple of things to know when using POP3 in regards to 'folders' and especially the 'spam' folder.
How messages marked as spam are delivered
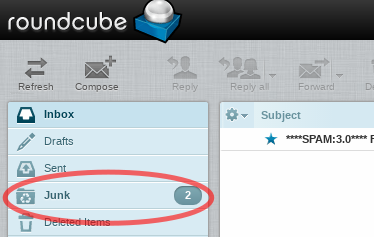
Messages marked as spam by our system will be delivered to a folder called "spam" - this is sometimes displayed as Junk on some email clients. This spam folder resides on our mail servers and can be seen my IMAP clients.
However, when using POP3, you will only download email that is in your Inbox, and so messages in the spam folder will not be downloaded. - This behaviour can be overridden with a 'sieve filter' though. See below.
How to view messages marked as spam when using POP3?
As described above, messages that we mark as spam will be put in a separate folder on the server side. You can use our webmail (https://webmail.aa.net.uk) to view the spam folder - you can then drag and move messages from your spam folder to your Inbox if you wish for them to be downloaded by your POP3 email client.

How to deliver messages marked as spam to your Inbox when using POP3?
You can override the behaviour of delivering spam messages to the spam folder. To do this, you create a 'sieve filter' to force all messages to be saved to the Inbox. This can be done via webmail as follows:
- Log in to webmail - https://webmail.aa.net.uk
- Click Settings (top/right)
- Click Filters (left)
- Click the Plus (+) icon at the bottom of the 'Filters' column
- Set the filter as follows, as per the image below:
- Filter name: Save all messages to Inbox
- For incoming mail: all messages
- execute the following actions: Move message to Inbox
- Click Save (at the bottom)
- You're done!
