Email on Android: Difference between revisions
Appearance
Content deleted Content added
added descriptors to images |
No edit summary |
||
| Line 17: | Line 17: | ||
{| |
{| |
||
|- |
|- |
||
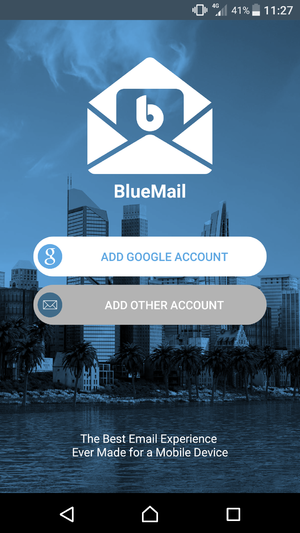
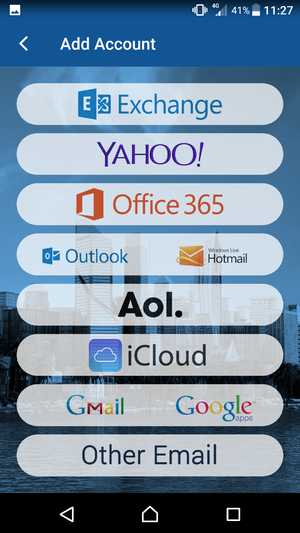
| [[File:Bluemail 1.png|thumb| select "add another account" ]] || [[File:Bluemail 2.png|thumb| select "other email"]] || |
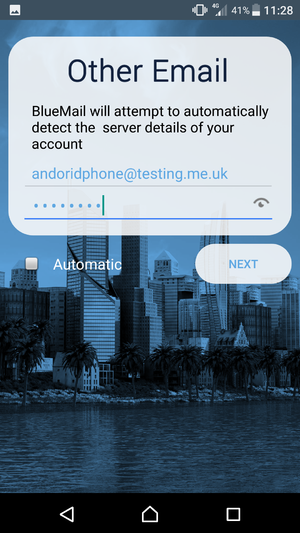
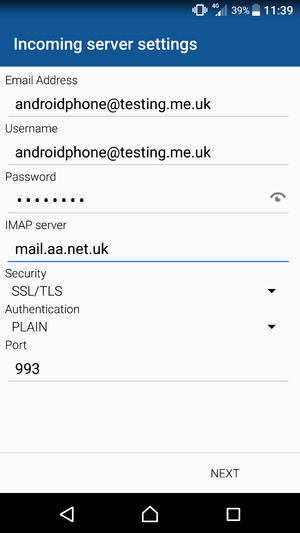
| [[File:Bluemail 1.png|thumb| select "add another account" ]] || [[File:Bluemail 2.png|thumb| select "other email"]] ||[[File:Bluemail 4.png|thumb| enter the email address and password of your account, then UNCHECK "automatic"]] |
||
|- |
|- |
||
| [[File:Bluemail |
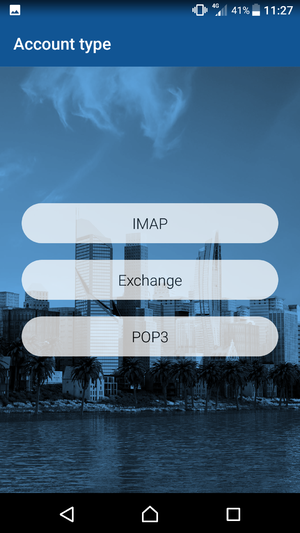
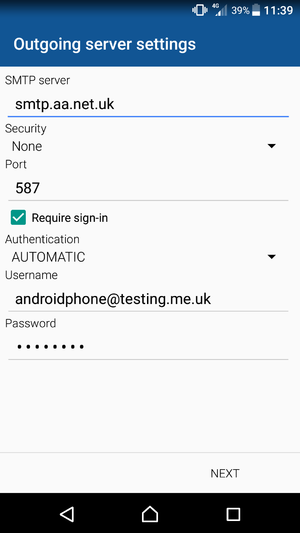
| [[File:Bluemail 3.png|thumb| select "IMAP"]] || [[File:Bluemail 5.png|thumb|fill in the details as shown then click next]] || [[File:Bluemail 6.png|thumb| fill in the details as shown then click next]] |
||
|- |
|- |
||
| [[File:Bluemail 7.png|thumb | fill in these fields with anything you want then click done]] |
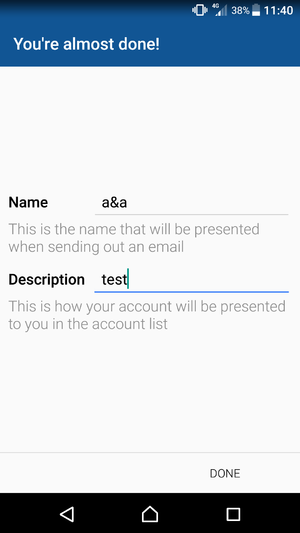
| [[File:Bluemail 7.png|thumb | fill in these fields with anything you want then click done]] |
||
Revision as of 09:50, 27 September 2017
This page is here to help you configure your A&A E-mail address on an Android phone
Default applications will not work
To use an A&A email address on android you need to use a third party app; Google/G-mail, in their infinite wisdom do not allow you to change the settings that you need to for it to work. Below is a list of apps, as of writing (2017-09-26) do in fact support A&A e-mail addresses:
All of these applications were tested and confirmed working on the following devices:
- Sony Xperia ZX, android version 7.1.1, 2017-08-01 security patch
- Samsung Galaxy A5, android version 5.0.2
